When working with revisions, the workflow is thus. You place a CLOUD around the items that have been revised and you also place a TAG directly adjacent (and touching) the cloud that gives reference to the cloud, letting people (mostly the contractor or installer) know which project revision this work is associated with. This keeps things organized.
When you issue another revision.. you must give it a separate number.. again, this keeps things organized. But, this time you must do another task. It is common practice to turn off the CLOUD from the previous revisions, but LEAVE the old revision TAGS on. This alerts people to the fact that another previous revision has occurred in this area, but doesn't cloud the issue with extra clouds laying around. haha
At first this may seem like a daunting task.. but Revit has it all figured out.
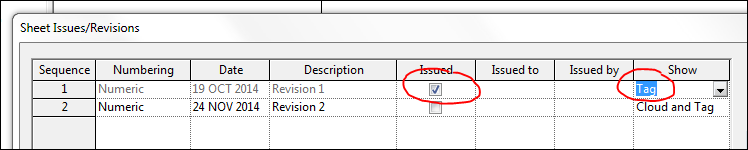
If you have been using the Revision system built into Revit (accessed by selecting Manage>Additional Settings>Sheet issues/Revisions).. the dialog and revision cloud on the drawings should look like this.

When you ADD another revision and ISSUE your first one:
First, check the box for ISSUE (this locks the revision clouds from being edited).
Second.. change the dropdown from 'Cloud and Tag' to just 'Tag'.. and all the revision clouds from the previous revisions will turn OFF but their associated tags will be left ON.

BAM.. move along.


No comments:
Post a Comment